As an Amazon Associate we earn from qualifying purchases.
There are many reasons why I want to know how to mount a scope on a handgun, a rifle, or a shotgun. One reason is that using a red dot scope on a handgun allows you to pick up your target easily. This is important as you train for accurately finding and hitting your mark.
If you spend time on the range with different target practice exercises, the scope sight helps you find that mark quickly. Let me look at how it is done.
Contents
How to Mount a Scope on a Handgun
Knowing how hard your recoil is with any firearm you have, is essential when getting ready to mount a scope on the top. If you do not know anything about buying mounts and scopes, you can take your unloaded handgun in a case to a firearms dealer and find out what your options will be.
Whether or not you reload your own ammunition, your scope and mount choice is based on your firearm brand, frame size, and length of barrel.

Removing Iron Sights
Mounting a scope or red dot sight on a semi-auto pistol can be quite different than doing the same thing on a revolver. Because of this, I will walk through 2 examples.
The first example is a semi-auto Glock pistol using a red dot sight. The second shows a .357 Smith & Wesson revolver using a scope.
Always refer to your handgun manual first, so you know what parts of the handgun must be removed and how it is done. Unload your handgun first. Place your handgun in a gun mount or vise so you can easily work on it.
Removing Glock Dove-Tail Sight
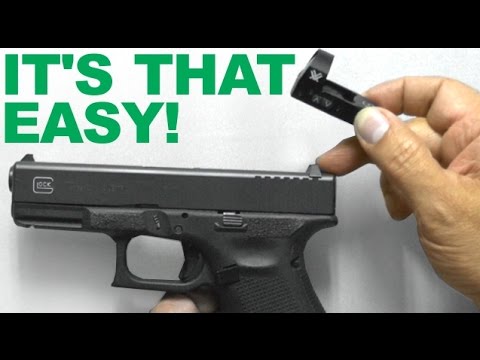
The dove-tail sight removal on a semi-auto Glock pistol is simple. You will need a good sight removal device which slides the dove-tail rear sight out of its grove, using opposing forces (see the video link below for a visual). It is advised to dismantle your pistol first to avoid potential damage.
Install the Mount Base
Slide in the base of your scope’s sight mount, which fits into the Glock’s rear sight grove. In this example, the Vortex Venom Red Dot Sight Mount is used. Make sure the slide-in base is centered.
Add on the mount plate on top and use a touch of Loctite blue thread sealer for the screws. Use a manual screw to initially set the two screws. Then go back to seat both screws, using a torque wrench with Phillips bit. Tighten at 8-inch pounds.
Mount the Sight
Place the small red dot sight over the base so the holes match up to the two remaining mount holes. Set the screws with Loctite blue, using the same process as above and it is done.
Removing Sights on a Revolver
For this example, I will look at mounting a scope on a .357 Smith & Wesson revolver, with a frame in K, L, or N designation.
First you must remove the iron sight the manufacturer has added to the gun. Start at the rear end sight assembly on top, and use a screwdriver to undo the screw, counting each turn click as you go. Leave that loosened screw in place, which is connected to a T-nut underneath.
You need to know the click amount, in case you remove the optic later and put the iron sight back on. You apply the right number of clicks to add the screw back in.
Now you move to the front screw and undo it. Once finished, your front end will lift upwards from the frame. Gently push back on the front-end edge, moving the iron sight backwards out of its slots, until you can lift out the whole assembly.
Put the iron sight assembly aside in a safe place. A good place would be in the same place where you store your guns so you won’t lose it.
Prepare the Mount Site
On this S&W model example with an L frame, the manufacturer has pre-drilled three holes that sit under the iron sights, sized 648.
You can check each hole for debris by using the front screw you just removed and screwing it in all the way on each hole. If there is debris inside, use a 648 tap to go in and remove it.
You can add a little carburetor cleaner in the holes. Then air spray or blow that back out to remove any older contaminants still in place.
Be sure to do this as you will be adding Loctite on the new screws going in to set them properly. Always use blue Loctite, never red, for scope mounts.

When you choose the new scope, also choose a mount with built-in recoil lugs. These absorb recoil force into the frame, rather than applied on the screws which will weaken your installation over time.
The mount should also have a front slide area that sets the scope solidly in place, with no chance to move around. Apply a touch of fresh Loctite into the holes.
Install the Mount
Now you add the receiver (rail) mount which should line up nicely over the three drilled holes you just cleaned out and prepared with Loctite. Apply a dab of Loctite on the new screws going in.
Add the prepared 648 screws into the three holes, using a 332nd allen wrench to screw them in, but not too tight. Once they are all the way in, apply a 1/8th turn to set each screw with the allen wrench. This scope mount installation is called a Weaver mount application.
Looking for a gun cabinet to store your firearms? Read my detailed review on my top picks.
Types of Handgun Scopes
Now I added on the scope. Choosing the scope for a handgun can be a little overwhelming when it comes to what type you should get, you have popular options like the Buckmaster and Prostaff. Here are some pointers:
- Choose something that is lighter than what you would install on a rifle or shotgun.
- You do not want to add a lot of weight when you need to control recoil on a handgun.
- Some use a scope as long as the barrel, while others use a shorter scope.
The next choice is deciding between the red dot versus a cross-hair view, or the holographic sight. The red-dot scope that sends a red dot to a small screen in front.
A red dot, especially one that can be adjusted to a smaller point when desired, works very well for nearly every situation. This includes low-light scenarios. It is also great for shooting practice and competitions.
Think about what distances you are comfortable shooting at with a high percentage of hitting your mark. You also are further removed from the scope, when using the handgun.

You typically hold the handgun out with straight arms, although you can brace yourself on a solid resting ledge if out hunting. Think over these concerns and it will help you choose a scope that is right for you and your handgun.
Mount the Scope
Mounting the scope is relatively easy, as most come with 2 mounting rings that are placed over the mount. Make sure these rings will fit the mount in place, and then follow these steps:
- Take the bottom half of the rings and fit them over the mount, then tighten the screw underneath to set them in place.
- Place your scope into the rings and adjust the position.
- Add the top ring caps over the scope to meet up with the bottom rings, then add the screws through the top to bottom. Tighten each one in a pattern by screwing three to six turns on each screw. Do this from front to back on one side, then switch to the other side and complete the action from front to back.
- Both rings should be snug against the recoil lug, then you can tighten the screws until they hit bottom. You can still rotate the scope in place at this point.
- Your last step is to make sure your scope is leveled properly. You may need to rotate the scope, especially if there are precision dial knobs that help you sight the scope.
- Once in place, torque the screws to secure the mount and scope into its final resting position. Listen for the click as you torque the screw, so you know when to stop.
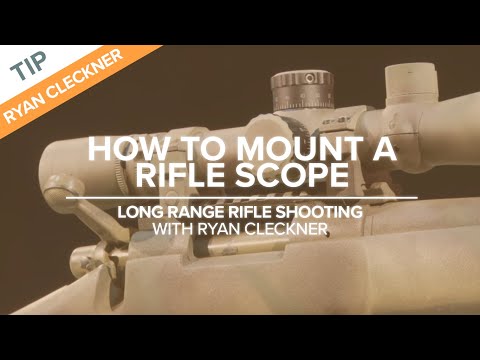
How to Mount a Rifle Scope
Installing a mount on your rifle is like the mount installation process on the handgun done earlier. However, you must always check to decide on the best mount for your brand and model.
In most cases, rifles will already have holes drilled in, or have grooves in place, for adding on the mount. Set your rifle upright on a gun cradle so you can easily set the mount and scope on top of it.
It will also fit very nicely in your storage as long as you’ve planned it well. If you’re looking for a storage solution, take a look at my review on the top-rated safes for weapons.

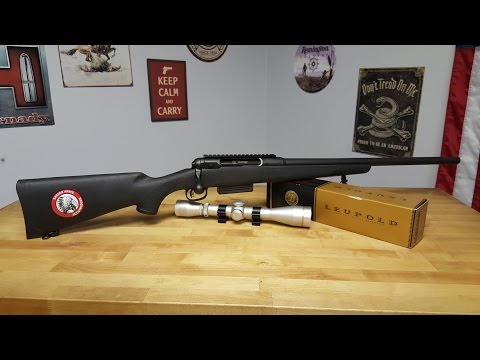
A bolt action rifle, for example, must use a rail mount that rests over the open chamber of a bolt action rifle. You add in the screws to which you have added a touch of Loctite, and then seat the screws in. Once all the screws are in, you do the final torque. This makes the rail mount solidly seated on your rifle top.
Mount the Scope
Add your bottom scope rings, along with the screws, onto the mount. Place your scope on the bottom rings. You can add the top rings too, along with the screws.
But, only screw them in as far as possible without tightening over the scope. Your goal is to still be able to move your scope back or forward, for now.
Pick up your rifle and place it into your shoulder like you usually do before shooting your target. The rifle was originally designed so that you rested your cheek on your rifle butt to take your shot using the original sight.
With the mounted scope in place, your sight angle now brings your head up too far from your original resting spot, causing strain. Add padding or a cheek rest on the butt top to get your head rest placement up high enough to easily see through the scope.
If a bolt action rifle, make sure it is slid back in the open position during installation, so you know how far forward on the butt you can use padding.
Test the Scope Position
Get into your regular shooting position. This could be resting the rifle on a solid flat surface while seated, standing, or shooting in a prone position. Adjust and slide the scope to where it is comfortable to look through the scope. Lower the scope view to its most wide-open aperture.
Once you have the scope placement settled, tighten and torque all the screws in place, so you have a solid mount and scope installation. Always use a pattern method to tighten the screws, so there is even space between each side of the rings.
Watch the video below, about setting the scope on the rifle. It also offers tips that help you get ready for sighting the scope.
How to Mount a Scope on a Shotgun
The process used for installing a mount on a shotgun is like the rifle and handgun processes already discussed. You lay the cleared shotgun on a gun cradle, clean the drilled holes on the shotgun and clean any screws you will be using for the mount.
Make sure the rail is directly placed on the top of your shotgun, then lightly turn the screws. Use a digital leveler to make sure it is level to 2 degrees or less. When ready, set the screws tightly.
Set the Scope
Place the bottom ring halves onto the rail on either side of the open chamber. Tighten the screws, but not too tightly. Place your scope inside the bottom rings and slide the scope to be centered between the two bottom rings, with the precision dial sitting center between the two rings.
Check Scope Placement
Add on the top rings and gently tighten the screws. Use the digital leveler to balance the scope position and check your view through the scope. Tighten down the screws when completed.
Conclusion
Mounting scope procedures are generally the same throughout, with slight differences in firearm brand, action type, and frame design. Your professional firearms dealer may also refer another style of mount, which works better with your firearm construction. Now, get ready to sight that scope!